 ultimate-guide
Custom Pergola Design and Installation Guide
Table of Contents
- Why a Custom Pergola Changes Your Outdoor Living Space
- Designing Your Custom Pergola: Size, Style, and Attached vs. Freestanding
- Best Materials for Outdoor Pergolas: Cedar, Vinyl, and Aluminum
- Average Cost of Custom Pergola Projects: A Detailed Breakdown
- Pergola Building Permit Requirements: What to Check First
- Installation Process: Site Prep, Foundations, and Assembly
- Shade Solutions, Canopy Options, and Finishing Touches
- DIY Kits vs. Professional Installation: Which Is Right for You?
- Bringing Your Custom Pergola Project to Life
- Frequently Asked Questions
Last Updated: September 7, 2026
Why a Custom Pergola Changes Your Outdoor Living Space
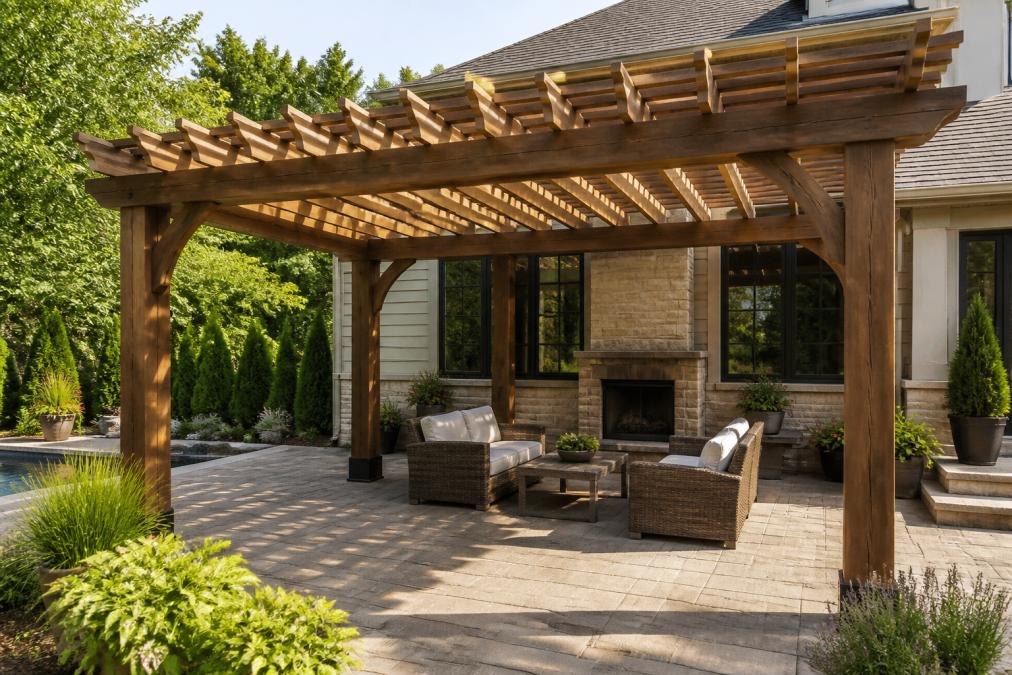
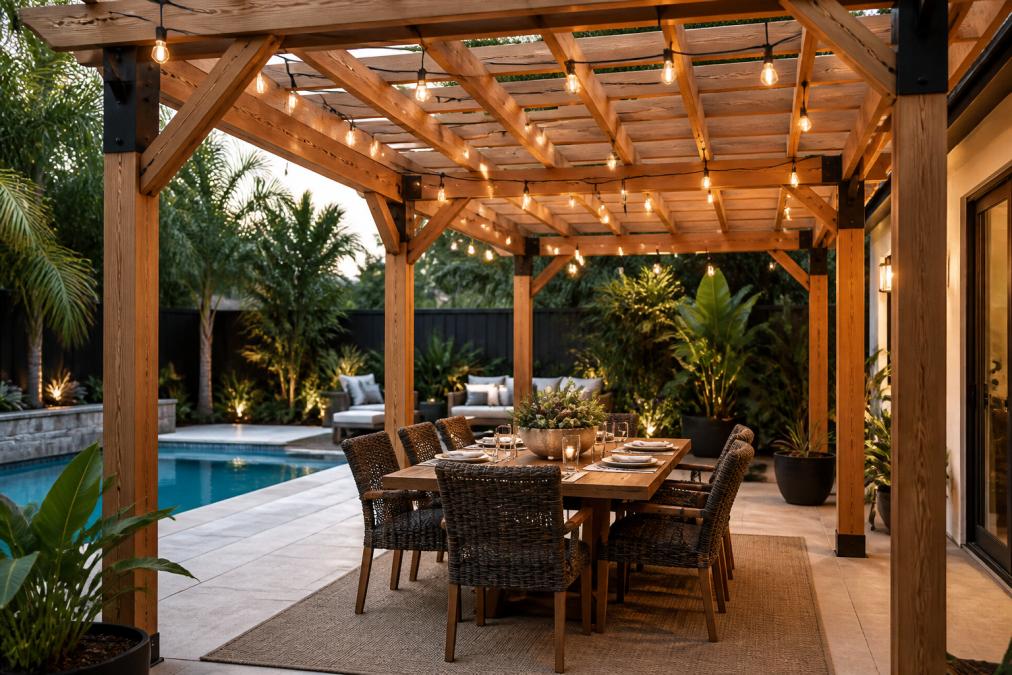
A custom pergola design and installation project transforms an ordinary backyard into a functional outdoor living space that extends your home's usable square footage. Unlike a premade kit that forces your yard to fit a generic footprint, a custom-built structure is engineered around your home's architecture, your lot's sun patterns, and the way you actually entertain.
The most common feedback we hear is that the pergola becomes the anchor of the entire yard (architecturaldigest.com). It defines where the dining table goes, where the string lights hang, and where guests naturally gather. Beyond aesthetics, a well-placed pergola provides measurable relief from harsh afternoon sun while keeping breezes flowing, which matters in hot climates where full solid roofs trap heat.
Before you price out materials or call a contractor, understand this: the decisions you make in the design phase determine 80% of the project's success. Mistakes here are expensive to fix after concrete is poured. Below, we'll walk through sizing, materials, permits, foundations, and the DIY versus professional question so you can plan with confidence.
Designing Your Custom Pergola: Size, Style, and Attached vs. Freestanding
The first decision is structural: an attached pergola mounts directly to your home's exterior wall, while a freestanding pergola stands on its own four posts. Attached designs create a seamless transition from indoors to outdoors and typically cost less because they require fewer support posts. Freestanding pergolas offer placement flexibility, making them ideal for defining a separate zone in the middle of a yard or over a poolside lounge area.
Sizing starts with function. A dining area for six needs roughly a 10 by 12 foot footprint, while a conversation lounge with two sofas requires about 10 by 10 feet (thisoldhouse.com). Standard custom pergola heights range from 8 to 10 feet at the beam, which clears most ceiling fans and string light installations while still providing shade.
Key design variables to nail down early:
- Roof pitch and rafter spacing affect both shade percentage and how rain sheds off the structure
- Post size and spacing determine load-bearing capacity and visual weight
- Architectural style should echo your home's lines, whether modern, Mediterranean, or coastal
Best Materials for Outdoor Pergolas: Cedar, Vinyl, and Aluminum
Material choice dictates longevity, maintenance, and appearance, so it deserves careful consideration. Western red cedar is the classic premium option, prized for natural insect resistance and warm tones that weather to a silver-gray patina. Cedar requires periodic sealing to maintain its color but is straightforward to repair.
Vinyl pergolas with vinyl cladding offer the lowest maintenance path. They never rot, resist moisture, and clean with a hose, but they lack the structural strength of wood for wide spans and can look hollow or plasticky up close. Powder-coated aluminum sits between the two: it handles high wind loads well, resists corrosion, and accepts custom colors, though it costs more than vinyl.
The cost-benefit analysis matters as much as the material itself. Cedar is cheaper upfront but demands refinishing every few years (familyhandyman.com). Aluminum has the highest initial price but near-zero maintenance. Vinyl falls in the middle but limits your design options for roof pitch and beam size.
| Material | Maintenance | Lifespan | Best For |
|---|---|---|---|
| Cedar | Seal every 2-3 years | 15-20 years | Natural look, custom details |
| Vinyl | Power wash annually | 25+ years | Budget-friendly, low upkeep |
| Aluminum | None | 30+ years | Windy sites, modern styles |
Average Cost of Custom Pergola Projects: A Detailed Breakdown
The average cost of custom pergola work varies widely because size, material, foundation, and labor all shift the total. Rather than quoting a single figure that may not match your situation, understand where the money goes so you can budget realistically and compare bids fairly.
Material cost is the largest variable. Cedar lumber pricing fluctuates with timber markets, while vinyl and aluminum are sold as engineered kits or fabricated components that carry a premium. Freestanding structures need more posts and footings than attached designs, adding to both material and excavation expense. A level concrete patio slab reduces foundation work, while installing on grass requires digging footings below the frost line.
Labor reflects complexity. A simple rectangular attached pergola on an existing slab is a two-day job for a crew. Adding a shade canopy, integrated lighting, or custom dimensions extends the timeline and the bill. Permits, if required, add a modest fee to the total.
Because every site differs, the smartest move is requesting itemized quotes from contractors. A detailed estimate breaks out materials, labor, foundation, and permit fees so you can spot where costs concentrate and adjust your design accordingly.
Pergola Building Permit Requirements: What to Check First
Many homeowners assume a pergola is exempt from permitting, and that assumption causes real headaches. Pergola building permit requirements vary by municipality, and skipping the process can lead to fines, stop-work orders, or being forced to tear down a structure you just paid for.
Most local building departments classify pergolas as open structures, which often places them under different rules than fully enclosed patios or rooms. However, the specifics depend on your zoning district, the structure's size, and its proximity to property lines and your home. Some jurisdictions require a permit for any structure over a certain square footage, while others exempt open-sided shade structures below a height threshold.
Zoning regulations also govern setbacks, meaning how far the structure must sit from lot lines, and whether an attached pergola counts as an addition to your home's footprint. Homeowners associations may impose their own design review even when the city does not require a permit, so check your HOA covenants before ordering materials.
The good news: permit handling is straightforward when you know the process. A professional contractor pulls the permit, schedules inspections, and ensures the structure meets load-bearing requirements for your area's wind zone.
Installation Process: Site Prep, Foundations, and Assembly
A successful installation hinges on what happens before the first post goes up. Proper site preparation includes marking utility lines, leveling the ground, and confirming drainage so water doesn't pool around the footings. Skipping these steps leads to a pergola that sits crooked or shifts over time.
Foundation footings are the backbone of structural integrity. Most codes require concrete piers extending below the frost line, with post anchors embedded to connect the wood or aluminum posts securely. On an existing slab, you may need to core-drill and set anchors rather than pour new footings. The foundation must handle the structure's weight plus wind uplift, which is why rafter spacing and beam sizing connect directly to your local wind load requirements.
Assembly follows a predictable sequence:
- Set and cure the concrete footings
- Attach post anchors and stand the corner posts
- Install beams across the posts, checking for level and square
- Run rafters at the specified spacing
- Add decorative trim, lattice, or a shade canopy
- Finish with stain, sealant, or paint as the material requires
DIY assembly of a premade kit works for handy homeowners with a weekend and a helper. Professional installation becomes worth the cost when the site has slopes, the design includes custom dimensions, or local codes demand engineered connections.
Shade Solutions, Canopy Options, and Finishing Touches
A bare pergola provides dappled shade that shifts with the sun's angle, which is pleasant in the morning but intense at midday. Adding a shade solution gives you control over comfort and extends the hours you can use the space.
Shade canopy options range from fixed fabric panels to retractable systems. A solid canopy blocks nearly all sunlight and sheds rain, but it also traps heat underneath. A louvered or slatted roof lets you adjust the shade percentage by rotating slats, giving you full sun, partial shade, or complete coverage as conditions change. Fabric canopies in light colors reflect heat and are easy to swap seasonally.
Climbing vines are the most natural canopy, but they require patience and seasonal maintenance. They also add weight and moisture to the structure, so confirm your beams can handle the load before planting.
Finishing touches turn a functional structure into a destination. Integrated LED lighting along the beams extends evening use. Ceiling fans improve airflow in still summer air. Outdoor curtains provide privacy and block low-angle sun. Each addition should be planned during design, not retrofitted later, because wiring and mounting points are easier to install before the rafters go up.
DIY Kits vs. Professional Installation: Which Is Right for You?
Choosing between a DIY kit and professional installation comes down to your skills, timeline, and the complexity of your site. A straightforward, level backyard with simple access is a realistic weekend project for someone comfortable with power tools and reading an assembly manual. Premade kits arrive with pre-cut lumber and hardware, which removes the hardest part of custom work: precise cutting.
DIY kits have real limitations. They come in fixed sizes, so fitting an odd-shaped space often requires modifications that void warranties. They also place the burden of code compliance on you, meaning you must research permits and wind load requirements yourself. A mistake in leveling or anchoring can compromise the entire structure.
Professional installation makes sense when your project involves custom dimensions, a sloped yard, attachment to your home, or any design feature beyond a basic rectangle. A crew handles permitting, foundation work, and assembly in days rather than weekends, and the result carries accountability for structural integrity.
The hybrid path works for many: buy a quality kit and hire a contractor for the foundation and post setting, then handle the rafter installation yourself. This splits the difference on cost while ensuring the structural core is done right.
Bringing Your Custom Pergola Project to Life
Planning a custom pergola design and installation project involves more decisions than most homeowners expect, from material longevity and permit requirements to foundation footings and shade coverage. Getting each choice right means the difference between a structure that enhances your outdoor living space for decades and one that needs repairs within a few seasons.
The most common source of project failure isn't poor craftsmanship, it's poor planning. Homeowners who rush past the permitting stage, skip the foundation work, or choose materials based on upfront cost alone often end up paying twice. A thorough approach that addresses site conditions, local codes, and your actual usage patterns will serve you far better than chasing the lowest bid.
Our team handles the full scope, from custom pool and patio construction to permit handling that keeps projects moving, so your pergola integrates seamlessly with the rest of your landscape design. We bring professional craftsmanship to every detail, ensuring your new shade structure becomes the centerpiece of an outdoor oasis you'll actually use.
Get A Quote today and let us turn your backyard vision into a built reality.
Frequently Asked Questions
How much does a custom pergola cost compared to a premade kit?
The average cost of custom pergola projects is higher than premade kits because of tailored dimensions, material selection, and site-specific engineering. A custom-built structure is designed for your exact space and can integrate features like attached roofs or integrated lighting. Premade kits are generally more affordable upfront but may require additional fitting and often lack the structural integrity needed for high-wind areas. For an accurate estimate, request a consultation to review your site conditions and design goals.
Do I need a building permit for a custom pergola in my backyard?
Pergola building permit requirements vary by local jurisdiction, but most areas require a permit for structures over a certain size, especially when attached to your house. Permits ensure your design meets local building codes for structural integrity, wind resistance, and set-back lines. Skipping the permit can lead to fines or complications when selling your home. A professional installer can handle the permitting process for you, ensuring your project is compliant and passes all necessary inspections.
What is the most durable material for an outdoor pergola?
For longevity and minimal upkeep, powder-coated aluminum is a top choice. It resists rust, warping, and insect damage, and it holds up well in harsh sun and rain. Western red cedar is a popular natural option for its beauty and natural resistance to decay, but it requires periodic sealing or staining. Vinyl cladding is another low-maintenance option, though it can become brittle in extreme cold. Your choice should balance your aesthetic preference, maintenance tolerance, and local climate.
Get started with Gorilla Treescape LLC and create a custom pergola that transforms your outdoor living space. Our team manages the design, permitting, and installation from concept to completion, so you get a shade structure built to last without the stress of coordinating multiple contractors.