 ultimate-guide
Artificial Turf Installation: A 2026 Guide
Table of Contents
- What Artificial Turf Installation Involves
- Why Artificial Turf Works in Humid Climates
- Understanding Artificial Turf Drainage Systems
- Artificial Turf Installation Timeline: What to Expect
- Artificial Turf Maintenance Tips for Long-Term Performance
- DIY vs. Professional Installation: Key Differences
- Residential and Commercial Applications
- Frequently Asked Questions
Last Updated: September 28, 2026
What Artificial Turf Installation Involves
Artificial turf installation requires careful planning, precise ground preparation, and professional execution to create a durable, low-maintenance outdoor surface that lasts.
The installation process begins with a comprehensive site assessment to evaluate the existing landscape, identify drainage patterns, and determine ground conditions. Poor drainage or unstable soil can compromise the entire project.
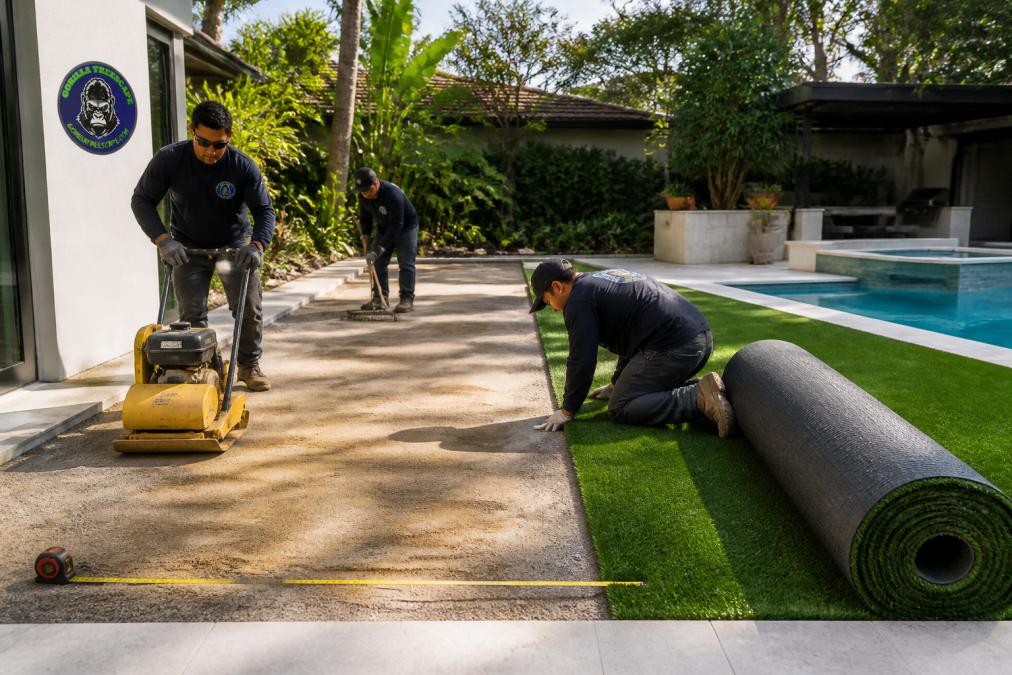
Ground preparation is the foundation of successful artificial turf installation. Existing vegetation and topsoil must be removed, and the subgrade compacted to create a stable base. A sub-base layer of crushed stone or recycled asphalt improves drainage and provides structural support.
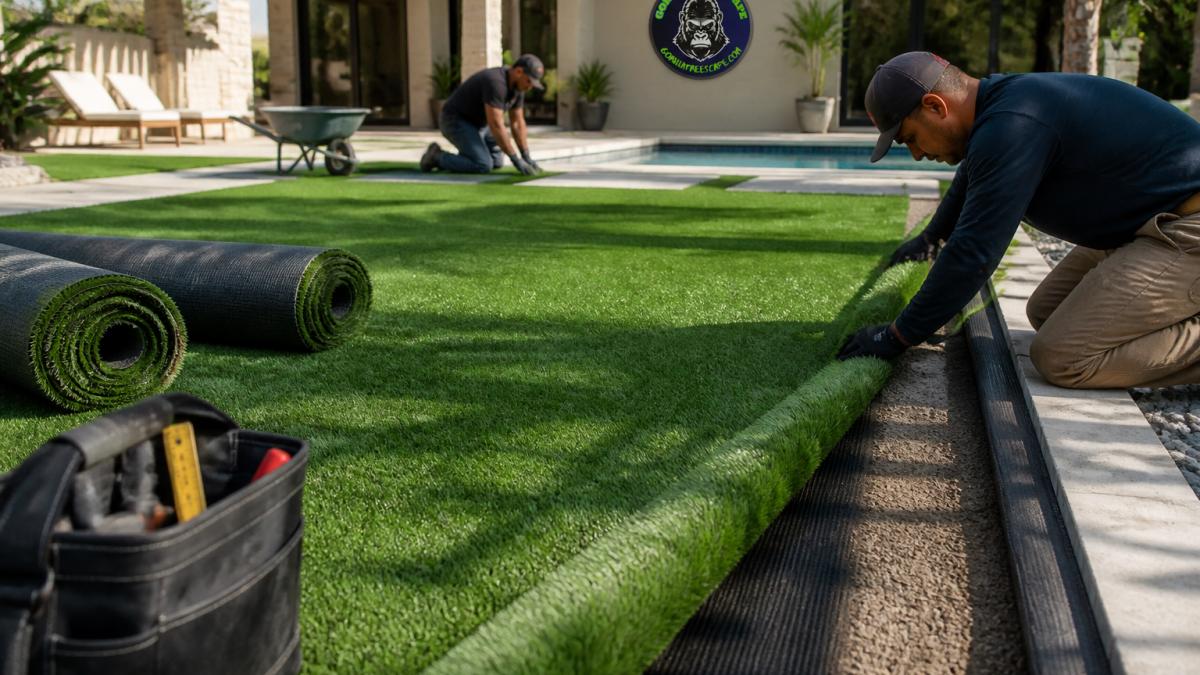
Once the base is ready, a weed barrier is installed, and the artificial turf is unrolled and positioned. Seaming and anchoring secure edges and joints. Infill materials, sand or rubber granules, are spread across the surface to add weight, improve drainage, and provide cushioning.
Why Artificial Turf Works in Humid Climates
Synthetic grass performs exceptionally well in humid environments where high moisture, heat, and salt air challenge traditional lawns.
Natural grass in humid climates faces fungal growth, disease, and pest infestations. Artificial turf eliminates these biological challenges, the synthetic fibers do not rot, do not support fungal growth, and do not require fungicides.
UV-resistant fibers withstand intense sun exposure without fading. Heat-reflective technology reduces surface temperature, making the turf comfortable underfoot in environments where ground temperatures exceed 140 degrees Fahrenheit.
The drainage system built into quality artificial turf prevents water from pooling, which is essential in climates prone to heavy rainfall and high humidity. Permeable backing allows water to drain through the turf into the subbase, eliminating standing water that breeds mosquitoes and algae.
Understanding Artificial Turf Drainage Systems
A properly designed drainage system is critical to the longevity of artificial turf installation in tropical climates. Water management determines whether your turf remains usable or becomes a breeding ground for bacteria, odors, and structural failure.
Quality synthetic grass drains at least 2-4 inches per hour. The real challenge in sandy soil is ensuring water moves through the sub-base and away from the installation without pooling or creating hydrostatic pressure beneath the turf backing.
Water movement follows a three-stage path: (1) water enters the turf pile and passes through the permeable backing, (2) water flows through the sub-base layer, and (3) water exits via grading or drainage infrastructure. The permeable backing must allow water to pass through without clogging from infill migration or sediment buildup.
The sub-base layer must be engineered for drainage and stability. A 4-6 inch layer of crushed stone or recycled asphalt creates channels for water movement. In sandy environments, this base layer is essential because sand alone compacts unevenly and allows water to pool. Perforated drainage pipes may be added to direct water away, especially in low-lying properties or areas with poor natural drainage.
Permeability testing during and after installation verifies water drains at the expected rate. Pour measured water onto the turf surface and time drainage; if water remains after 30 minutes, the drainage system is inadequate. Inadequate drainage causes mold growth, bacterial proliferation, backing degradation, and structural failure. In humid climates, standing water attracts mosquitoes and creates odor issues.
Grading and slope are fundamental to drainage success. The installation area should slope gently away from structures at 1-2% (roughly 1 inch of drop per 4-8 feet). Without proper grading, water collects in low spots regardless of sub-base quality.
Infill material affects drainage performance. Sand-based infill drains faster; rubber provides better cushioning and heat management. Hybrid systems balance both. Infill must be spread evenly; uneven distribution creates drainage dead zones.
Artificial Turf Installation Timeline: What to Expect
Most residential artificial turf installation projects take 3-7 days from site preparation to final inspection.
Site assessment and ground preparation typically require 1-2 days, including vegetation removal, grading, and subgrade compaction.
Base layer installation, laying the sub-base and weed barrier, usually takes 1 day for standard residential applications. The crushed stone or recycled asphalt must be properly compacted to prevent settling later. This step directly affects how long your artificial turf installation will perform without shifting or developing low spots.
Turf laying and seaming typically requires 1-2 days depending on the area size and complexity of the layout. Seaming and anchoring require precision to ensure the turf does not shift under foot traffic. Edge finishing and securing the perimeter adds another half-day to a full day of work.
Final grading and infill application complete the project. The infill material is spread evenly across the entire surface and worked into the synthetic fibers. This final phase takes 1-2 days and is essential for the turf's appearance and performance.
Artificial Turf Maintenance Tips for Long-Term Performance
Synthetic grass requires far less maintenance than natural turf, but it is not completely maintenance-free. Regular care extends the life of your artificial turf installation and keeps it looking fresh.
Brush the turf regularly, ideally weekly or bi-weekly, to keep the fibers standing upright. A stiff broom or specialized turf brush works well. This prevents matting and maintains the natural appearance of the synthetic grass. High-traffic areas benefit from more frequent brushing.
Remove debris promptly. Leaves, twigs, and dirt should be cleared away regularly. A leaf blower or vacuum designed for artificial turf works well. Allowing organic material to accumulate can trap moisture and promote bacterial growth beneath the surface.
Rinse the turf occasionally with water to remove dust and keep the surface fresh. A garden hose on a gentle setting is sufficient. This is particularly important in dry climates where dust accumulation is heavy.
Address stains immediately. Most stains can be removed with mild soap and water. For stubborn stains, specialized artificial turf cleaner is available. Avoid harsh chemicals that can damage the synthetic fibers.
Inspect the seams and edges periodically to ensure they remain secure. Foot traffic and weather can gradually loosen anchoring. Tightening seams before they separate prevents larger problems.
DIY vs. Professional Installation: Key Differences
Installing artificial turf yourself is possible, but the risks often outweigh the savings, especially in sandy soil environments where ground preparation errors have immediate and expensive consequences. Understanding the differences between DIY and professional installation helps you make an informed decision.
DIY installation requires significant equipment investment: compactors, measuring tools, seaming machines, and infill spreaders. Renting this equipment can be costly, and improper use creates problems that are difficult to reverse. Ground compaction is particularly critical in sandy environments. Sand compacts unevenly and settles over time, especially under foot traffic and water infiltration. Inadequate compaction leads to settling, low spots, and premature wear. A professional crew has the experience and equipment to recognize when the base is properly prepared and to identify soft spots or unstable areas before turf is laid. They understand how sandy soil behaves under load and moisture, and they compact in layers to achieve uniform density.
Sand-specific challenges include weed growth through the sub-base. Weeds germinate in sand and push up through the turf, creating visible bumps and dead spots. Professional installers install a quality weed barrier and ensure it is properly sealed at seams and edges. DIY installers often underestimate the importance of this step or use inadequate barrier material, resulting in weed problems within months.
Seaming and anchoring are technical skills that take practice to master. Poor seams create visible lines, allow water infiltration, and compromise durability. Professionals have seaming machines and techniques that ensure watertight joints. DIY seaming often results in visible seams that detract from appearance and allow water to penetrate beneath the turf backing, accelerating degradation.
Drainage is where most DIY installations fail, particularly in sandy or low-lying properties. Without proper understanding of water flow, sub-base design, and soil behavior, homeowners often create drainage problems that become apparent only after heavy rain. Standing water beneath the turf leads to bacterial growth, odor, accelerated backing degradation, and structural failure. In sandy soil, water moves quickly downward but can pool laterally if the sub-base is not properly graded or if the perimeter is not sealed. A homeowner may not recognize these issues until the turf has already failed.
Professional installation includes a site assessment that identifies potential drainage issues, soil instability, and water table concerns before work begins. The contractor can recommend solutions, such as additional drainage pipes, grading adjustments, or deeper sub-base layers, that a homeowner might overlook. This upfront problem-solving prevents expensive repairs or complete reinstallation later. Professionals also understand local soil conditions and seasonal water patterns, allowing them to design a system that performs year-round.
Equipment operation is another risk. A compactor operated incorrectly can create hard spots or fail to achieve uniform density. A seaming machine used improperly can damage the turf backing or create weak seams. Professionals have years of experience operating this equipment safely and effectively.
Professional installers carry liability insurance and provide warranties on their work. If something goes wrong, drainage failure, seam separation, settling, you have recourse and the work is corrected at no additional cost.
Residential and Commercial Applications
Artificial turf installation serves both residential and commercial properties, each with distinct requirements and considerations.
Frequently Asked Questions
How long does artificial turf installation typically take?
Professional artificial turf installation timelines vary based on yard size and site conditions. Most residential projects take 3-7 days from site assessment through final installation. Larger commercial applications or complex drainage requirements may extend this timeframe. Your contractor should provide a detailed artificial turf installation timeline during the initial consultation, accounting for ground preparation, sub-base compaction, and proper seaming and anchoring.
What maintenance does artificial turf require?
Artificial turf maintenance tips include regular rinsing to remove dust and debris, brushing the pile to maintain appearance, and inspecting seams and edges. In humid climates, ensure your artificial turf drainage systems are functioning properly to prevent water pooling. Remove leaves and organic matter promptly, and check infill materials annually. Most properties need minimal maintenance compared to natural grass, though proper care extends turf durability significantly.
How do artificial turf drainage systems prevent water damage?
Artificial turf drainage systems use a permeable backing and sub-base layer to channel water away from the turf surface. Proper ground leveling and compaction during installation direct rainfall downward through the drainage capacity layers rather than allowing pooling. This is especially critical in humid regions where heavy rainfall is common. A professional site assessment identifies drainage challenges and ensures the system meets local requirements.
Can artificial turf be installed in small or HOA-restricted yards?
Yes, synthetic grass works in tight spaces and many HOA communities approve it. However, local zoning and HOA compliance varies by property. Some communities restrict artificial turf or require specific types. Always verify with your HOA before starting an artificial turf installation. Professional installers familiar with local regulations can navigate these requirements and ensure your project meets all compliance standards.