 how-to
Driveway Installation: A Complete How-To Guide
Table of Contents
- Understanding Your Driveway Installation Options
- Driveway Permit Requirements and Local Compliance
- Preparing Your Property for Driveway Installation
- The Driveway Installation Process: Step by Step
- Average Driveway Installation Timeline
- Professional Installation vs DIY: What You Need to Know
- Maintenance and Long-Term Care
- Frequently Asked Questions
Driveway Installation Miami
Last Updated: October 4, 2026
Understanding Your Driveway Installation Options
Driveway installation involves selecting materials, preparing your property, and executing the construction process to create a durable surface for vehicles. At Gorilla Treescape LLC, we work with homeowners to design driveways that enhance curb appeal while providing long-term functionality. The choice of material shapes everything that follows: cost, maintenance needs, lifespan, and aesthetic impact.
Your first decision is material selection. The three most common options each offer distinct advantages and trade-offs. Understanding these differences helps you make an informed choice aligned with your budget, climate, and long-term maintenance preferences.
Asphalt vs Concrete Driveway Pros and Cons
Asphalt driveways offer quick installation and lower upfront costs compared to concrete. The material is flexible, which helps it withstand freeze-thaw cycles common in variable climates. Asphalt requires regular maintenance, sealcoating every 2-3 years, to prevent cracking and water damage.
Concrete driveways last significantly longer, often 25-30 years with minimal maintenance. They resist weathering better than asphalt and require only occasional cleaning. However, concrete is prone to cracking in freeze-thaw conditions and can develop surface spalling if not properly sealed. Concrete also carries higher installation costs upfront.
The real difference comes down to your maintenance tolerance. Asphalt demands consistent care but costs less initially. Concrete requires less frequent attention but costs more to install and repair when damage occurs.
Permeable Pavers and Other Materials
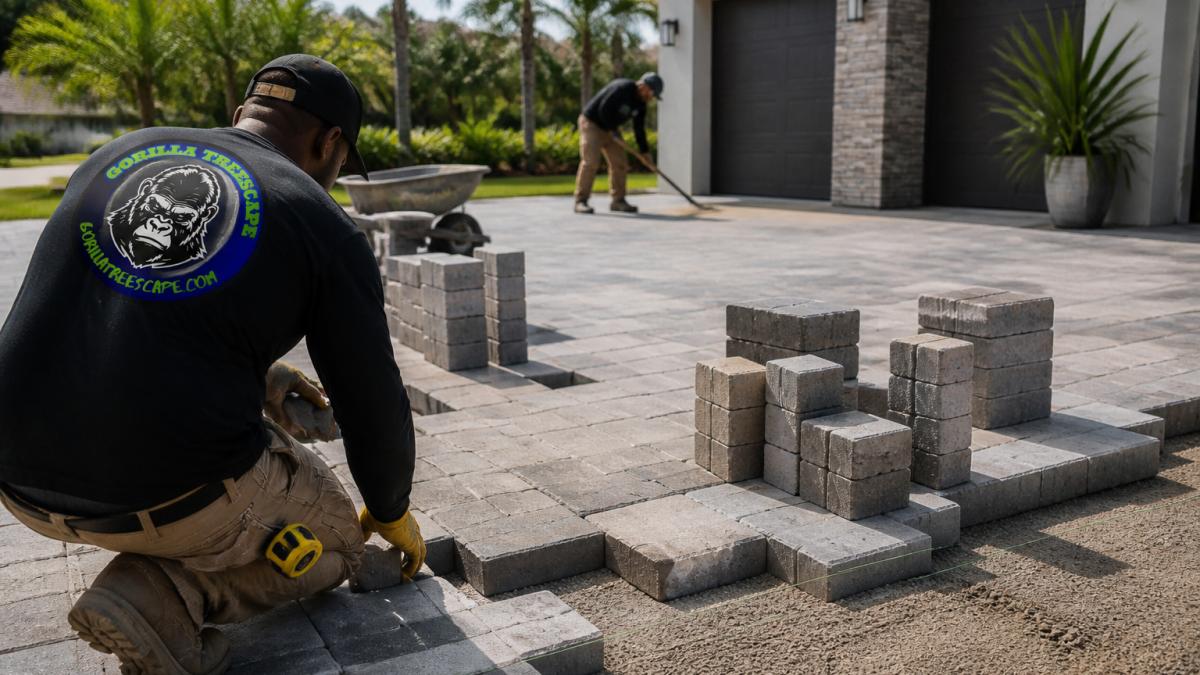
Permeable pavers, made from concrete, porcelain, or natural stone, allow water drainage through the surface. This addresses drainage issues common in areas with heavy rainfall. Pavers offer design flexibility and can be replaced individually if damaged.
The trade-off is cost and installation complexity. Permeable paver driveway installation requires careful sub-base preparation and proper grading. Natural stone pavers add aesthetic appeal but demand more maintenance than asphalt or concrete.
Recycled asphalt millings offer an economical, environmentally conscious option. They compact over time and require regular raking to maintain appearance. This material works best for temporary or secondary driveways.
Driveway Permit Requirements and Local Compliance
Most driveway installation projects require a building permit. Local building departments enforce regulations to ensure proper drainage, structural integrity, and safety compliance. Permits typically cover excavation depth, base layer specifications, surface finish standards, and drainage solutions.
Before starting work, contact your local building department to determine permit requirements for your property. Some municipalities allow minor repairs without permits, but new driveway installation almost always requires one. Processing typically takes 1-2 weeks, though timelines vary.
HOA communities have additional restrictions. If your property is governed by a homeowners association, review their guidelines before selecting materials or contractors. Some HOAs restrict certain colors, materials, or design elements. Working with a contractor experienced in local compliance, like Gorilla Treescape LLC, simplifies this process and prevents costly delays.
Preparing Your Property for Driveway Installation
Proper preparation determines whether your driveway performs well or fails prematurely. This phase involves site assessment, grading adjustments, and drainage planning.
Site Inspection and Grading
A site inspection identifies existing drainage patterns, soil composition, and structural issues. The inspector checks for standing water, poor grading, or unstable soil that could compromise the finished surface.
Grading, the slope and contour of the ground, directs water away from structures. Proper grading prevents water from pooling on the driveway surface or flowing toward your home's foundation. Most driveways slope at 1-2% grade to ensure adequate drainage.
Excavation removes existing pavement and prepares the sub-base. The depth depends on soil conditions and expected vehicle loads. Compaction during this phase is critical, loose soil beneath the surface leads to settling and cracking later.
Drainage Solutions for Your Climate
Drainage becomes critical in areas with heavy rainfall or poor natural drainage. Subsurface drainage systems, including French drains or permeable base layers, redirect water away from the driveway and foundation.
Permeable paver systems naturally manage water by allowing it to drain through the surface into a gravel base. This approach reduces runoff and prevents pooling. For traditional asphalt or concrete, edge drains or sloped surfaces direct water away from problem areas.
Your climate influences drainage design. Areas prone to heavy storms or flooding benefit from more aggressive drainage solutions. Gorilla Treescape LLC assesses your property's specific drainage challenges and recommends solutions that prevent long-term water damage.
The Driveway Installation Process: Step by Step
Driveway installation follows a structured sequence. Each phase builds on the previous one, and skipping steps or cutting corners leads to premature failure.
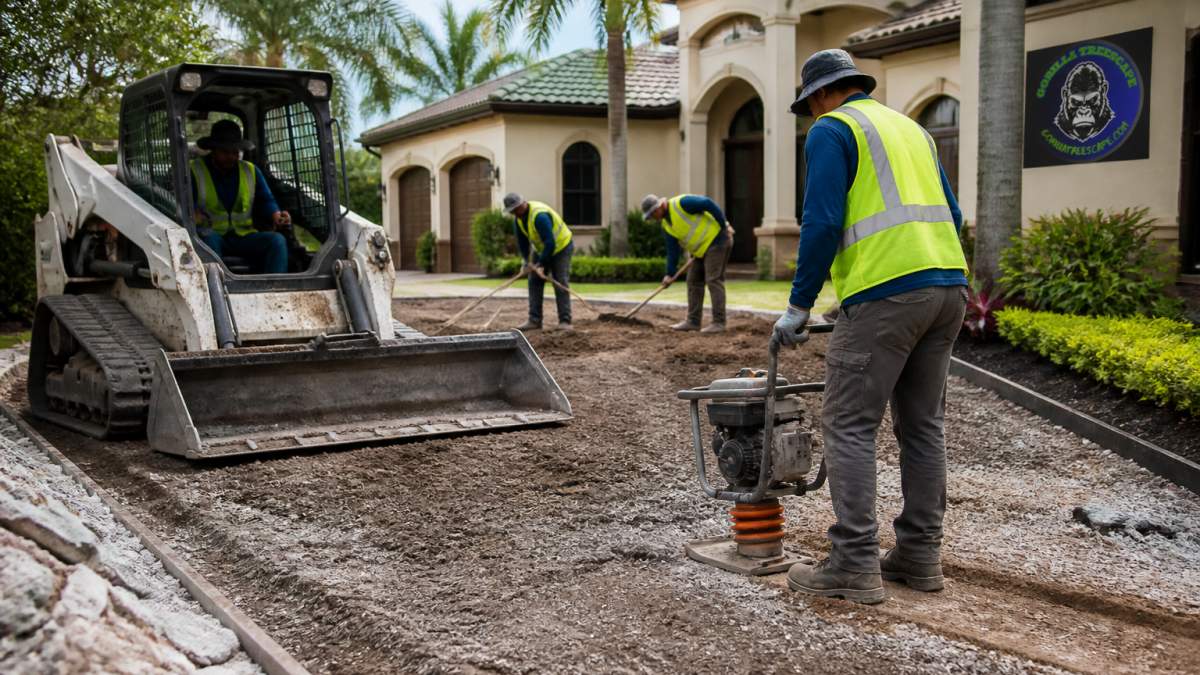
Excavation and Sub-Base Preparation
Excavation removes existing pavement and organic material down to stable soil. The depth typically ranges from 4-8 inches, depending on soil type and expected loads. Workers remove roots, debris, and unstable earth that could cause settling.
Once excavated, the sub-base is prepared. This involves grading the surface to the correct slope and removing any remaining debris. The sub-base provides the foundation for everything above, poor preparation here guarantees problems later.
Base Layer and Compaction
A compacted base layer, typically 4-6 inches of crushed stone or recycled asphalt, distributes vehicle weight and manages drainage. Proper compaction is essential. Each layer must be compacted to 95% standard density using mechanical equipment.
Inadequate compaction is a common failure point. Loose base material settles over time, creating depressions and stress cracks in the surface layer. Professional contractors use plate compactors or vibratory rollers to achieve proper density.
Surface Installation and Finishing
For asphalt, hot-mix asphalt is laid and compacted while still warm. The material bonds better when installed in proper temperature conditions. For concrete, the mix is poured, leveled, and finished with a broom or smooth trowel depending on desired texture.
Proper finishing prevents surface deterioration. A well-finished surface sheds water and resists UV damage. Sealcoating, applied 30-90 days after asphalt installation, protects the surface and extends lifespan.
Average Driveway Installation Timeline
Most driveway installation projects complete in 3-5 days from start to finish, depending on size and complexity. A typical 500-square-foot driveway takes about 3 days. Larger properties or those requiring extensive drainage work may take a week.
Weather delays are common. Asphalt installation requires dry conditions and temperatures above 50°F. Concrete needs 7 days to cure before vehicle traffic. Rain during this period can compromise the finished product.
Permitting adds 1-2 weeks to the overall timeline. Planning ahead and submitting permits early prevents unnecessary delays. Gorilla Treescape LLC handles permit coordination to keep projects on schedule.
Professional Installation vs DIY: What You Need to Know
Driveway installation demands specialized equipment, technical knowledge, and experience. While DIY approaches save money upfront, they almost always result in costly failures, especially in this region, where soil conditions and climate create unique challenges that amateur work cannot overcome.
Why Local Soil Conditions Make DIY Risky
The region's limestone bedrock, high water table, and seasonal flooding create a harsh environment for driveways. Proper installation requires:
-
Correct excavation depth and sub-base design based on soil testing. Limestone can be unstable; improper excavation leaves voids that cause settling. A professional assesses soil composition and adjusts base depth accordingly. DIY installers typically guess, leading to inadequate support.
-
Precise compaction to 95% standard density. This requires plate compactors or vibratory rollers, equipment rental costs add up, and improper operation wastes money. Loose base material settles within 1-2 years, creating depressions and stress cracks. A failed DIY base cannot be fixed without removing and replacing the entire surface.
-
Drainage system design and installation. French drains, permeable base layers, and proper grading must work together. A single mistake, incorrect pipe slope, missing perforations, or inadequate gravel, causes water pooling and accelerated failure. Professionals understand how water moves through soil and design systems that last.
Equipment and Material Costs
A typical 500-square-foot driveway requires excavation and hauling, sub-base material, asphalt or concrete, compaction equipment rental, sealcoating equipment and materials, and permits and inspections. When you factor in equipment rental and material costs, the total can be substantial.
Professionals carry insurance, warranties, and permitting responsibility.
The Hidden Cost of Failure
A poorly installed driveway fails within 3-5 years in this climate. Repair costs are steep, and if the failure is due to inadequate drainage, the problem repeats. You end up spending significantly more than a professional installation would have cost initially, plus years of frustration.
Permitting and Compliance Burden
Most driveway installations require building permits. The permitting process includes submitting plans and specifications, scheduling inspections (typically at excavation, base preparation, and final stages), ensuring compliance with local building codes and stormwater requirements, and potential HOA approval if applicable.
DIY installers must navigate this alone. Unpermitted work can result in fines, difficulty selling the property, or being forced to remove and redo the driveway at your expense. Professionals handle permitting as part of their service.
When DIY Might Work
DIY is reasonable only for:
- Temporary or secondary driveways using recycled asphalt millings (raked and compacted by hand)
- Minor repairs like filling small cracks or patching potholes
- Resurfacing an existing, structurally sound driveway with sealcoat or thin overlay
For a new primary driveway, a permanent investment in your property, professional installation protects your investment. The expertise, equipment, warranties, and permitting coordination justify the cost, especially given the region's challenging climate and soil conditions.
Maintenance and Long-Term Care
Your driveway's lifespan depends on maintenance. Asphalt requires sealcoating every 2-3 years and prompt crack repair. Concrete benefits from sealing and regular cleaning to prevent staining and deterioration.
Inspect your driveway annually for cracks, potholes, or drainage issues. Small cracks sealed early prevent water infiltration and larger damage. Neglected cracks expand quickly, especially in freeze-thaw climates.
Remove debris, leaves, and standing water regularly. These trap moisture and accelerate surface breakdown. In winter, avoid using salt-based de-icers on asphalt, they damage the material. Concrete tolerates salt better but still benefits from alternative de-icing methods. Our Landscaping & Pool Maintenance service can help keep your entire outdoor space in top condition.
Your driveway is a significant investment that impacts curb appeal and property value. Proper material selection, installation, and maintenance ensure years of reliable performance. Gorilla Treescape LLC specializes in custom outdoor living spaces through our Driveways & Decks service, offering professional driveway design and installation. We handle permitting, site preparation, and execution to deliver a finished surface that enhances your property while standing up to years of use. Get a quote today to discuss your driveway project and discover how professional installation protects your investment.
Frequently Asked Questions
What permits are required for driveway installation?
Most jurisdictions require a building permit before beginning driveway installation. You'll need to submit a site plan showing the driveway dimensions, materials, and drainage details. Your contractor should handle permit applications, but verify they're licensed and insured. Permit timelines vary, but professional contractors typically secure approvals within 4-8 weeks. Check with your local building department or homeowners association for specific requirements in your area.
What is the difference between asphalt and concrete for a driveway?
Asphalt offers lower upfront costs and faster installation but requires regular sealcoating and resurfacing every 15-20 years. Concrete costs more initially but lasts 25-30 years with minimal maintenance. Asphalt performs well in freeze-thaw cycles, while concrete is more vulnerable to cracking in extreme temperature swings. Concrete resists oil stains better, but asphalt is easier to repair. Your choice depends on budget, climate tolerance, and long-term maintenance commitment.
How long does a typical driveway installation take to complete?
A standard residential driveway installation takes 3-7 days once work begins, depending on size and material. Asphalt typically completes faster than concrete, which needs 7-14 days to cure properly before vehicle use. Permitting, site preparation, and weather delays can extend the overall project timeline to 4-12 weeks. Professional contractors plan the installation timeline during your initial estimate and communicate realistic completion dates upfront.
What drainage solutions work best for driveways in humid climates?
Proper grading and sub-base preparation are essential in humid regions to prevent water pooling and foundation damage. Permeable pavers allow water to drain through the surface into the ground, reducing runoff. French drains or swales can redirect water away from your property. Concrete and asphalt benefit from crown grading, which slopes the surface slightly to direct water to the edges. A professional site inspection identifies drainage challenges specific to your property before installation begins.